Saturday 27 May 2017

Small Scale Project Life


Hello, hello lovlies - this year I decided to join in with Ali Edward's 'Week In The Life' project and make a little mini album of the photographs (not as many as I would like as most days I forgot I was supposed to be taking photos).

I started by deciding to use an A5 folder, that came complete with page inserts, from The Range and cost about £1.50, 

Often, when I make double pages, I lay two sheets of cardstock side by side and work across both pages - a lesson learnt from Shimelle.  So I used seven pieces of A4 card and added patterned paper to these.


I then sliced them into two A5 pages and added my embellishments, photos and journaling.  I stuck the clear stickers onto the outside of the page protectors. 


This was quite an easy little project and one that would be ideal to quickly record the highlights of each day when on holiday.


Saturday 20 May 2017

May Virtual Crop - Class 3 with Mel using Shimelle Go Now Go

Welcome to the last class of the day.

My class uses the fantastic Go Now Go papers from Shimelle and American Crafts. It is a great travel line but as always it is fun to see what you can do with it beyond the original theme.

My class has FOUR layouts (I have been busy!) and two are very definitely travel themed but the other two are not so hopefully there is something in there for everyone!

Here are two of the four layouts - one travel themed one not, Click Here to go and download the instructions and see the rest of the layouts!


Have a lovely weekend everyone and don't forget to ask any questions, comment or share your work over on the ATDML # Create Facebook page.

May Virtual Crop Class 2 with Debs & Prima

Hello and welcome to the second class of ATDML's May Virtual Crop using these delicious papers from Prima's Rossibelle collection. In this class we will create two layouts with a very different look using the same collection, one that is soft and feminine and another that is a little more grundgey (without getting messy) suitable for both masculine and feminine photographs.


These highly patterned papers make it so easy to create detailed, decorated layouts without the need for buying expensive embellishments or add-ons.
Get ready for a little fussy cutting though.


You can find the link to free class instructions on the A Trip Down Memory lane website HERE.
I would love to see your pages when you are done, so please upload to the ATDML gallery and check in on the ATDML Create Facebook page.
Hope you all have a fabulously scrappy weekend.
Debs

May Virtual Crop Class 1 with Ann & Simple Stories I AM

Welcome, welcome to my May Virtual Crop class where I bring your three layouts created with Simple Stores I AM papers.


Plenty of cutting out of floral paper in this class and we use an entire sheet of 12x12 flowers across the first two pages, and keep it floral free on the third. All of these pages use standard 4"x6" or 6"x4" photos so even if you didn't manage to grab a kit and/or don't have these papers to hand you should be able to play along and be inspired by the placement of the elements featured.


Pop over the main website using THIS LINK to download your free instructions on how to create all three of my May pages. I'd love to see you share your layouts with us too, just upload your finished projects to our gallery and see what fellow "class mates" created.

Thanks for joining me, have fun and enjoy the rest of your weekend.

Friday 19 May 2017

May inspired by challenge

Ahead of our May virtual crop tomorrow we are pleased to bring you your May "Inspired by" image.


Use this image to inspire a layout, share it with us in our Facebook group in the May inspired by gallery and you could win a £5 atdml store voucher (drawn at random). Will you stick with teal/black and white, use typography on your page, black and white photos or the grid. It's up to you!

Look forward to seeing what you all come up with. I'll be playing along myself tomorrow.  Have fun.

Ann

Thursday 18 May 2017

A little bit edgy


As a scrapbooker I'm always trying to find different ways of doing things, to keep it fresh.  There will always be my go-to style but it is fun to mix it up a bit and sometimes it can result in some surprising results.

The Simple stories 'Domestic Bliss' range is packed full of brilliant wee bits and pieces which are not just for scrapping about your home life.

A while back I attended a conference in the gorgeous Gleneagles estate.  While we there there, these little guys came up to the house to visit us (scrounge for food).  I loved the Yellow spotty 'Domestic Diva' paper and thought it's be perfect with the teal and yellow floral side of the 'Loads of fun' paper to give that country feel.

I trimmed the 'loads of fun' down to 11x81/2" and aligned it to the bottom middle of the page.  I then cut a 4x8" piece of the 'domestic diva' paper and aligned it to the top of the page making sure it was centred to the middle of the 'loads of fun'.  I then attached the photo right to the edge of the page to make it look like the ducks were walking on to the layout.

To embellish, I tucked a paper doily under the photo and then I cut the large heart, heart in the blue circle and tag with heart from the elements on '4x4 elements' and arranged them using tape and foam to give a bit of dimension. I then added the subtitle in blue cardstock stickers.


Finally I cut an 8 1/2" semi circle and adhered it to the bottom of the page to act as a title base.  I then used 2 styles of Thickers to create the title.


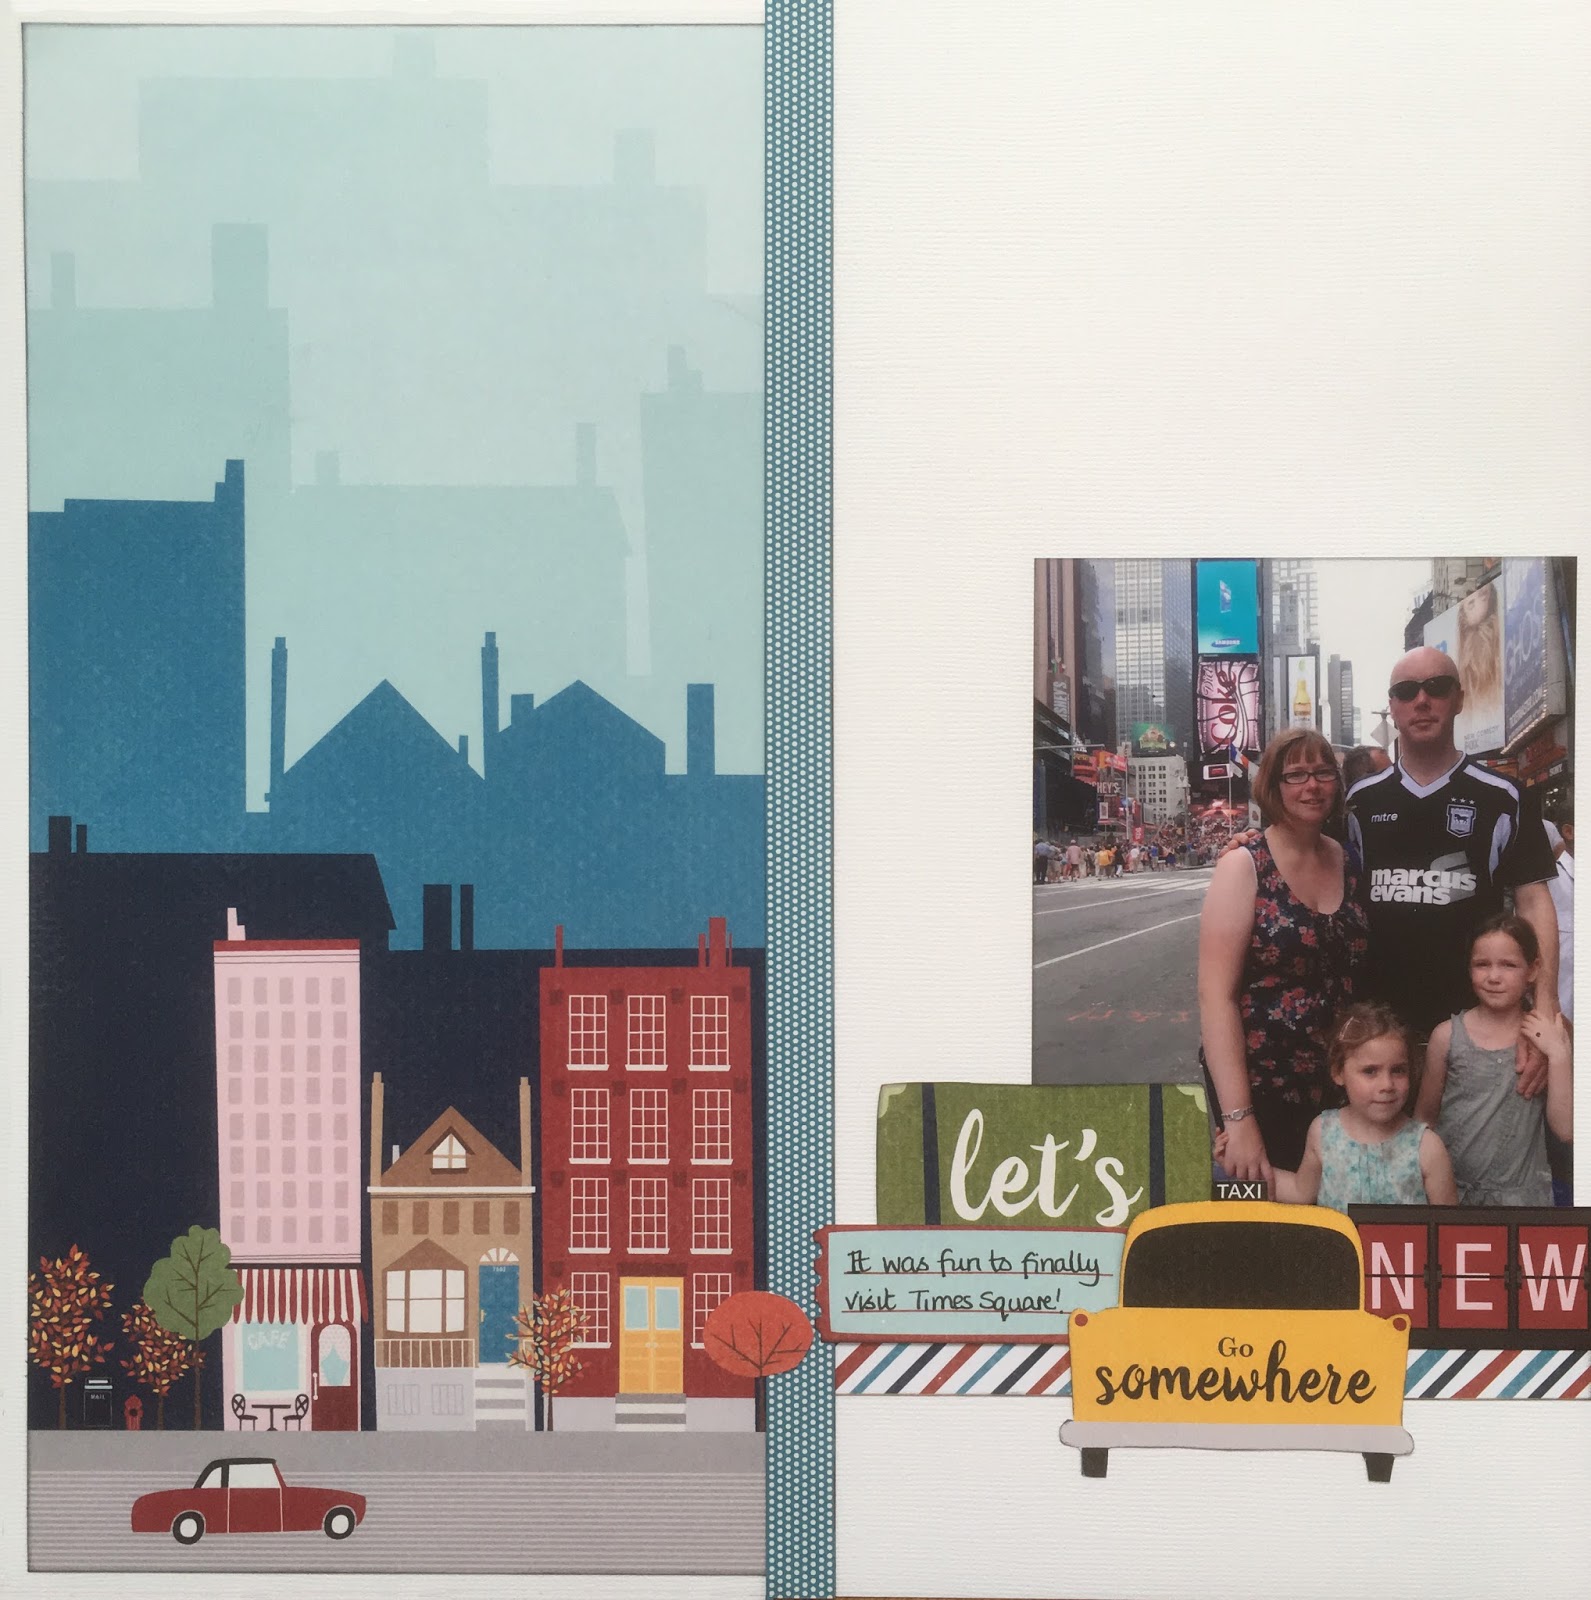
When we moved into our new home, first on Jamie's list was to get a wood burner into the house.  So last April I came home to find Jamie and our friend Darren dancing around on the roof fitting a chimney liner! 

It was a gorgeous day and once I got over the initial shock I managed to get some great photos of them up there.  


As the photo was taken from below I wanted to give the feeling that you were standing below them - they were up in the clouds and I was at street level.  

I started by rounding the corners of the blue gingham 'Work it Girl' to soften the edges.

I then cut a 2 1/2" strip of the 'domestic diva' and cut 2 clouds out of it either side of the photo.  I then mounted this onto white cardstock to make the cutouts stand out and adhered both to the page. I then used a mix of gems to give a bit of dimension to the clouds.  I attached the photo in the middle right to the top edge of the page to give a feeling of them being high up. 


 To create the house I cut the 'busy, busy, busy' element from '4x4 elements' and trimmed the frame.  I them stuck this onto the 'tidy' element to get the navy blue surround.  I then attached this using foam pads so I could create a hidden journalling spot.  I used a scrap of simple stories paper cut own to create the roof and also the grass on either side of the house.

To finish I trimmed down a piece of white card to act as the journalling spot and attached the roof at the top.  I used a cardstock 'wooden' frame to act as a border and then cut the house from the '4x4 elements' to add detail at the bottom.


Tuesday 16 May 2017

Heavily Influenced by Jane


Hello Lovelies - this week I have been heavily influenced by Jane.  I love her Saturday Videos that she posts on the second Saturday of each month, in particular the ones featuring her amazing mini album.

Our daughter graduates in July and it has been a long six years from start to finish of her University education.  She has had three very good friends who she has gone through the past five years with and they are all graduating on the same day.


I had planned on making her a little mini album to put her graduation photos in and asked her if the other girls would like one too and she said 'They would love it, mum!' so the decision was made.  I would make four mini albums, all the same. I used a mixture of Simple Stories ranges - The Story of Us and the Grad Collection.

I used Jane's locking pocket pages from this video 


and her envelope pages from this video.


I used simple library pockets in between so as not to over complicate the albums.


I am thrilled with the result - pages cut on my Silhouette so the album bases are very quick to put together and once I had made one it was fairly quick to copy it for the other three.


I can't wait to give each of the girls their little album but more than that can't wait to see them all graduate.

Saturday 13 May 2017

May's Saturday Video - My i pad stand...

Ha ha - so I just realised that my last video blog post didn't publish as scheduled and was sitting in draft form - sorry about that - but it means you get two for the price of one today!
Today's video is all about my Graphic 45 Vintage Hollywood ipad tv stand...

I made my ipad stand (minus the drawers) at the retreat and while I was there I was asked by someone if there would be a tutorial on how to make the ipad stand. Well - no, there isn't exactly but the technique for making the stand is the same as any cardboard construction. So today my video shows you how to construct the drawers using cardboard and then you can use the same technique to make virtually any box like structure.
The real trick to this sort of work is careful measurement - if you get that right then no reason why your structures shouldn't turn out perfectly. Using pva glue and paper gives a really strong join on the corners.

Thanks for watching!
Happy crafting.
Jane

April's Saturday video - and it's Make 'n' take time!

Since my April video day has collided with the Spring retreat I decided to bring my Make 'n' take for the retreat to you by video. This time it's a super simple origami flower card...
You will need 9 cut or punched circles (2" or 3" is fine - the bigger your circle, the bigger the card you will need!) Your circles should be cut from fairly lightweight double sided paper (small patterns with contrasting sides are great for this project)
You will also need a card blank and a brad for the centre of your card (or a button would do!)

Looks complicated? No - this is one I've made with my 10 year old paper crafters at school and they managed it no problem, so now it's your turn... enjoy!

And if you are at the retreat - please say hello and let me know if you have any requests for future videos.


Monday 8 May 2017

Telling a Story and quilting!


Following on form Karen's scrap lift of this page, I thought I would tell you a bit about the story behind it too.  I decided to have a play with a quilt pattern for my paper again and found this great pin on pinterest here.  However, I went a bit wrong - I was going to make squares, but I cut my paper into quarters rather than on the diagonals....so I ended up with triangles!  I like to have a flick through quilt patterns for paper piecing ideas as it is a great way to show lots of patterned papers together.

The other story to this page is probably the photo....yes it is an Icelandic rock in Rekyavik - there is a strong Icelandic folklore and belief in elves, and it has been known that whole highways have been redirected because they come across an Elven stone like this.  We had a lovely guide on holiday who told us all about the folklore, traditions and stories.

The papers are all from Kaisercraft, in particular the Ubud Dreams and Sea Breeze collections - I love the teal and woodgrain colours together.