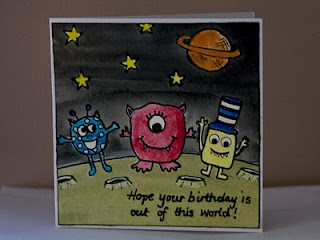
As promised here are a couple of my cards made using the techniques we practised in Debbies Watercolour background class. I had such a great time in Debbies class playing with paints that I couldn't wait to try the technique again so I spent an evening making cards. The one above is obviously a space themed one but below you can see a step by step photo illustrated tutorial as to how I made the Monster on a hill card. I had used masking fluid before a long time ago in Art classes at uni but the technique below is pretty much the exact process as taught by Debbie Jewell at the ATDML Spring Retreat 2010.
When Isabelle was born we joined an NCT group and all 8 of us are still friends today. Obviously, as the groups are ante-natal groups all of the babies were due and now have birthdays around the same time. On Monday the first of the group turns 5 and over the next 6 weeks they will all have a birthday so I will need 6 little boy birthday cards and two little girl cards. Hence, out came the Hero Arts Monster stamps which I recently bought for this very purpose!
To start off I got my sheet of watercolour paper (I used a piece from an A3 sized pad) I then used the card blanks to draw a light outline of the card shape repeating to fill the paper with a small gap between. I used 3 square cards and 3 portrait cards.
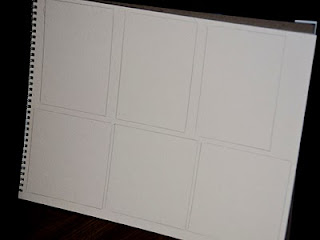 Next you are ready to create your design in each box. Remember that your finished piece will be slightly smaller than the box so don't put the important features too close to the edges.
I used Ranger Archival Jet Black ink to stamp my images and sentiments and a fine slick writer to add my doodles and freehand drawings.
For the card with the number 5 on it I folded a scrap piece of card in half and drew a 5 on it. I then cut around it so I had two duplicate pieces. I used the one with the pencil marks from my drawing of the number as a mask so that I could stamp monsters coming from behind it. The second clean number can then be painted separately and put on foam pads to raise it up or used on a different card.
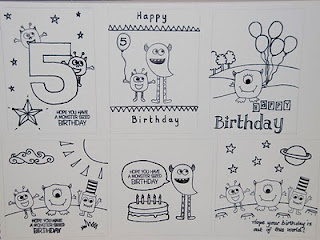 The next task is to apply the masking fluid over the drawing covering all the features which you do not wish to be the same colour as your background. The fluid will protect the white paper underneath when you apply your colour wash and when you remove the fluid it will leave you a pristine white surface to add further colour to. This will allow you to get clearer more vibrant colours as even painting over a pale wash will dull and change the colour on top.
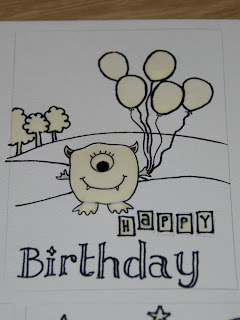 Allow the masking fluid to dry a little while you wash your brush. Be warned, you CAN get it out of a brush but you need to be quick and persevere to get it out! I wouldn't recommend using your nicest most high quality brush with the masking fluid though!
When you are done cleaning your brush your masking will be dry, it only takes a minute or two and shouldn't be left on your project for extended periods of time.
Using a watercolour paint apply a wash over the picture. You will notice on Debbies layouts she achieved a lovely blended finish between colours by starting with a strong wash at the top or bottom and adding water as she got closer to the middle resulting in the colour becoming less vibrant and then blending with another colour coming from the opposite edge.
If however you are painting a scene like mine you will not need to blend the colours necessarily but you can graduate your wash by adding water to create a pleasing effect as I have done with the hill in the distance.
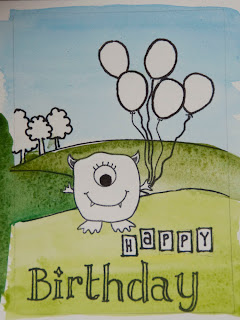 Allow the wash to dry. Once it is dry you can carefully peel the masking fluid off. If you find it difficult to start removing it, you can generally get it started by rubbing back and forth over it. Then peel it all off - think PVA that has dried on your fingers and you will get an idea of what this stuff is like!
Once all the masking fluid has been removed you can paint in the details as I have done with the balloons and the monster. I also used a white pen to fill the spaces on the hand drawn title. The areas were too small and fiddly to mask so I left them unmasked and used the Signo Uniball pen to add the white bits at the end, I did the same in the doodled scallops on the hill.
Finally trim the picture so it is a little smaller than your card (mine is 1/4" smaller overall giving a 1/8th" border all around) I inked the edge of my picture then adhered it to my card.


